فارسی
فارسی
Basler is one of the most reputable brands in industrial camera manufacturing. The company provides Pylon software for configuring and working with its cameras. With Pylon software, you can easily connect to various Basler cameras, adjust image brightness, determine image dimensions, specify the camera’s image capture type, and perform various camera settings.
To download and install Pylon software, click here.
Getting Started with Pylon Software
Upon installing the Pylon software, three programs are installed on your computer:
- Pylon Viewer
This is the main version of the Balser software, allowing you to connect to cameras, adjust image brightness, save camera images, and perform various camera settings. Throughout this article, whenever Pylon software is mentioned, it refers to Pylon Viewer.
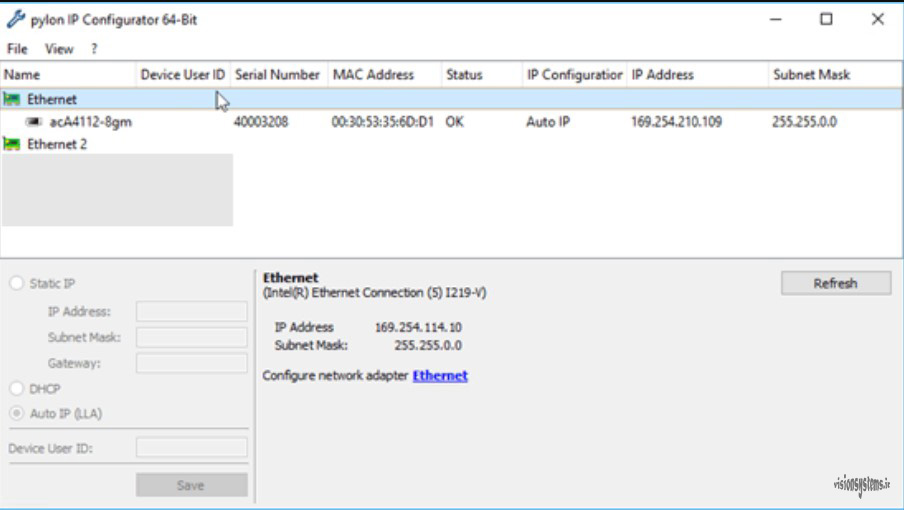
- Pylon IP Configurator
This software is used to configure the IP settings of network cameras, such as GigE cameras. Once the camera’s IP is configured using Pylon IP Configurator, the Pylon software (Pylon Viewer) will identify the camera.
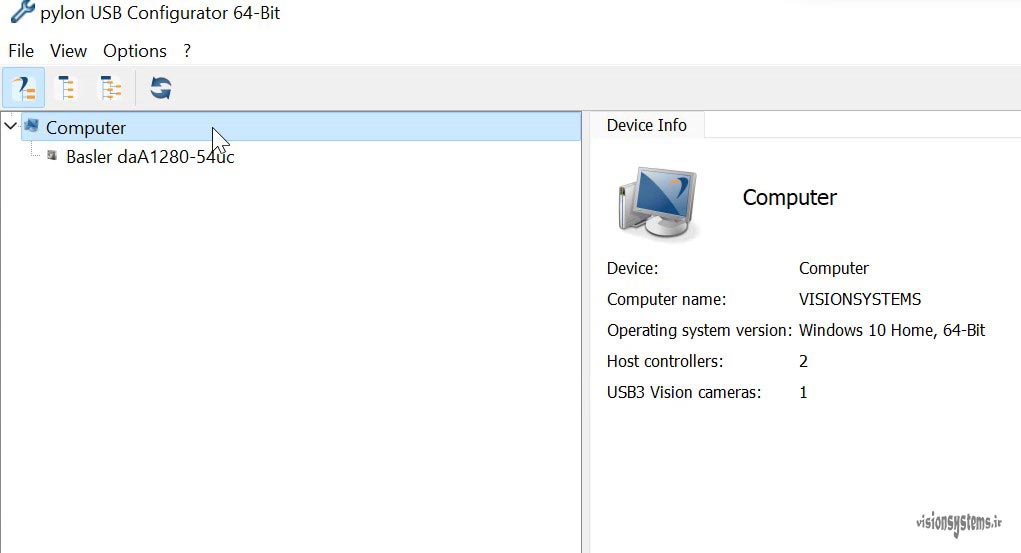
- Pylon USB Configurator
This software is used to configure the connection of USB cameras and displays any errors related to the camera connection.
Connecting to Basler Cameras
With Pylon software, you can easily connect to various Basler cameras. For example, to connect to a USB3 camera, simply connect the USB3 camera cable to your computer. As an example, we have connected a Basler dart USB3 camera to a laptop, as shown in the image below. Clicking on the camera twice will display the camera image, and you can perform various settings on the camera.
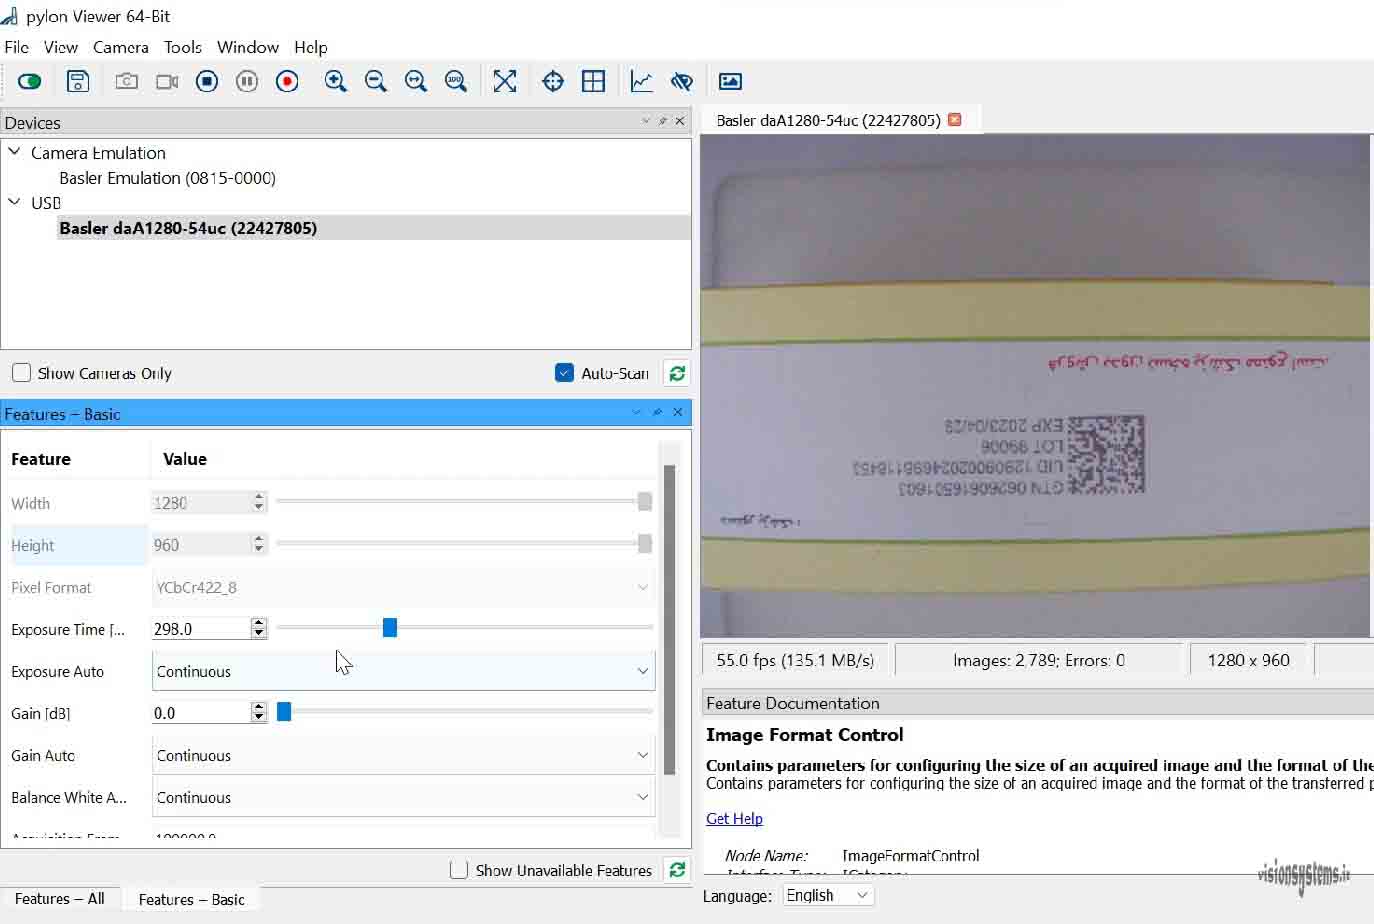
daA1280-54uc is the camera code. For more information about Basler camera codes, click here.
Adjusting Lens Focus with Basler Software
To adjust the focus of machine vision lenses, you can use the Pylon software. Clicking on the area of interest (in this case, the data code) will magnify the image using the magnifying glass in the Pylon software toolbar. Adjust the focus on the lens until the image has the maximum contrast. After adjusting the focus, the image will appear as shown below.

Pylon software also provides a tool to adjust the focus, displaying the image focus level as a percentage. This tool indicates whether the lens is properly focused.
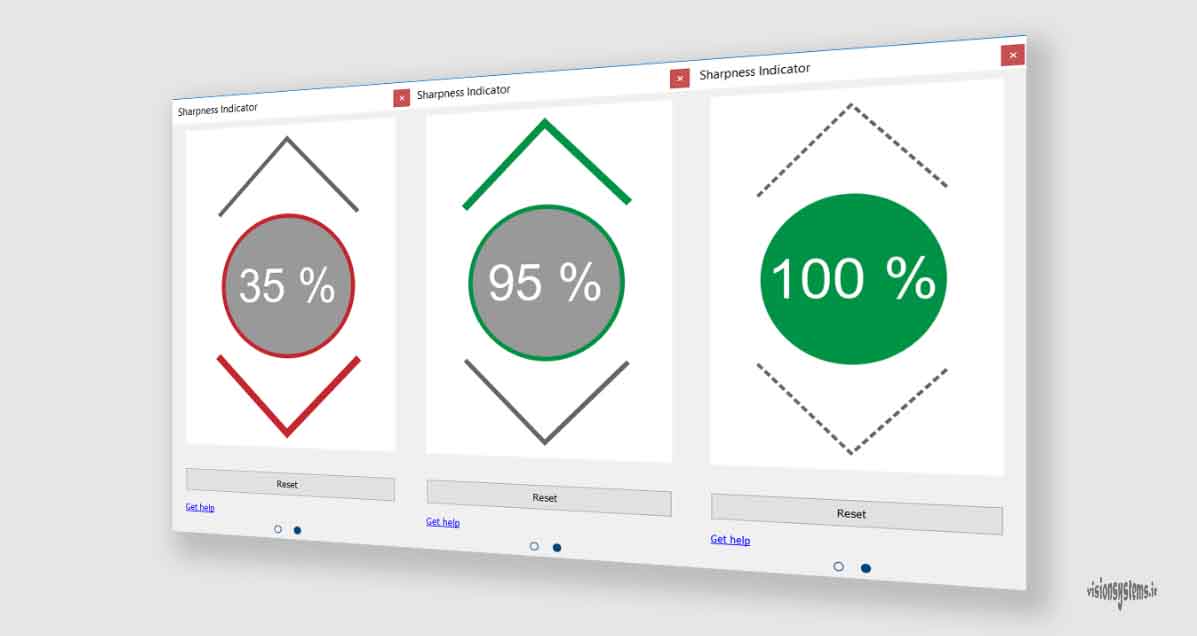
To access this feature, select the option shown in the image from the toolbar. Then, use the black box shown in the image to define the desired area. Adjust the lens focus until the number displayed in the Pylon software reaches its maximum.
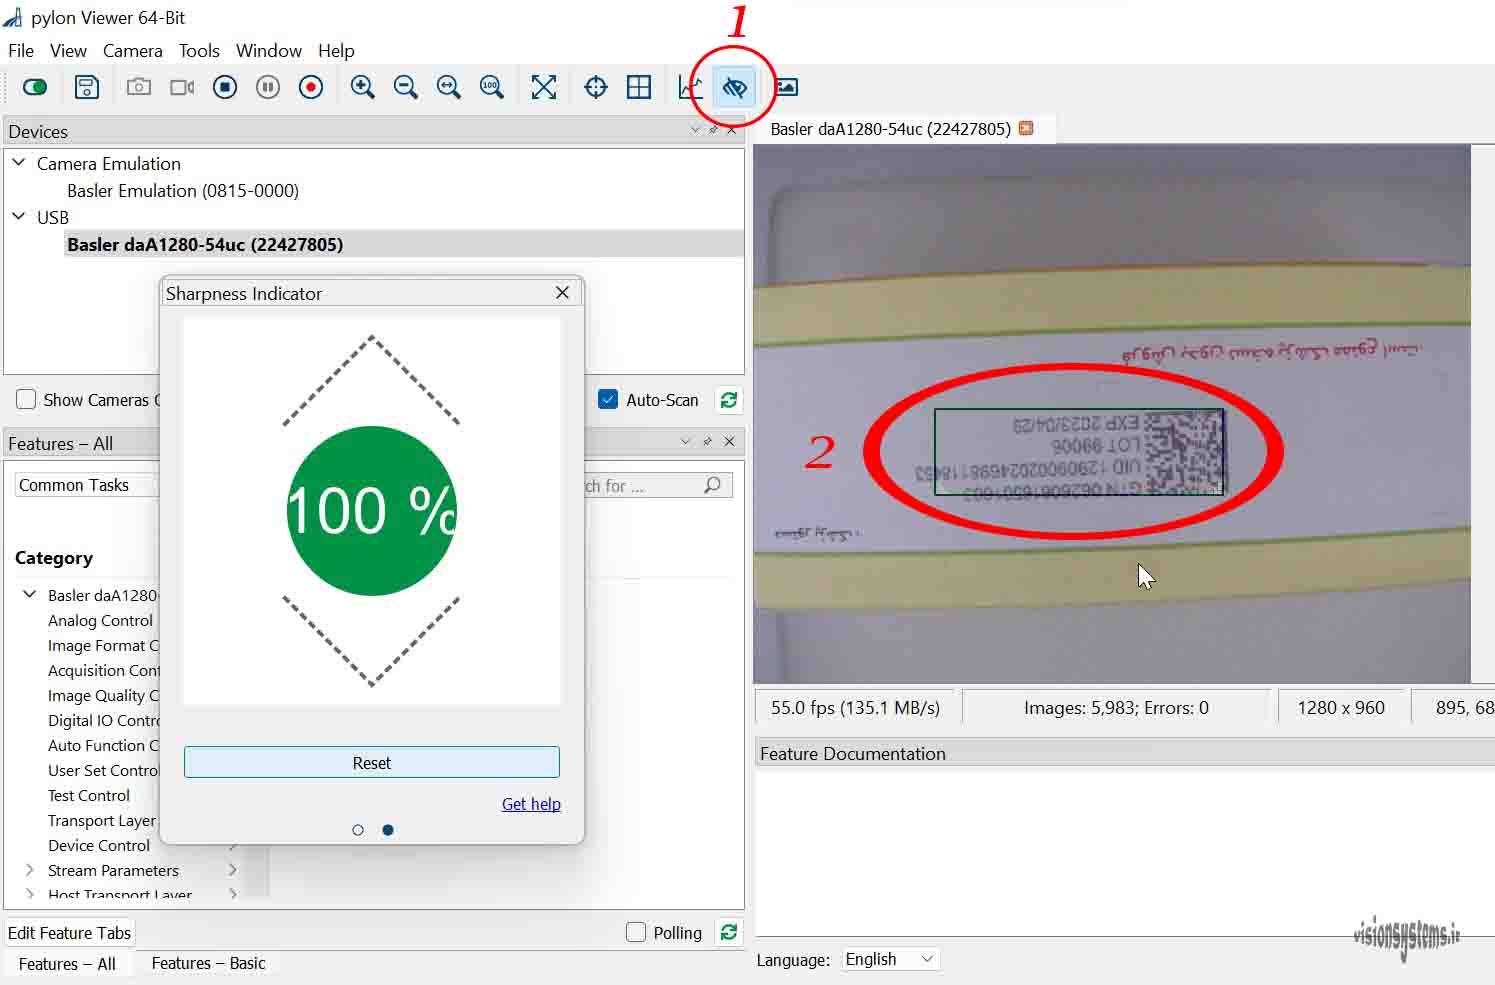
Here, after adjusting the lens, the displayed number is 100, indicating that the focus is optimized.
Viewing and Saving Images in Pylon Software
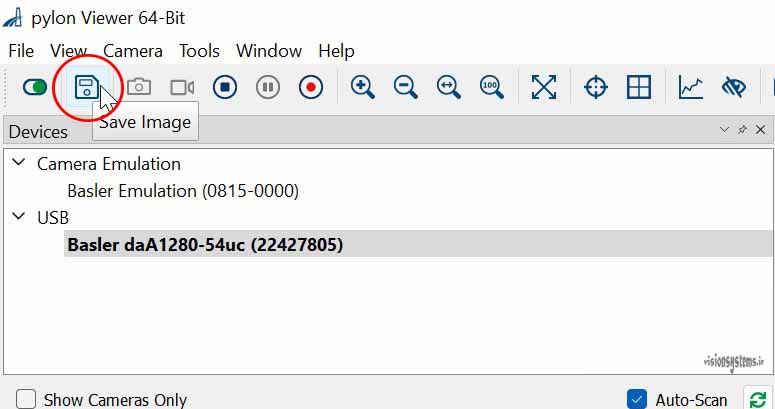
To test and analyze a product, you need to capture multiple images of it. With Pylon software, you can easily do this. To save images, click on the “Save Images” option in the toolbar and enter the image name.
After saving the images, you can use the powerful Halcon software to test and analyze your desired features on the images.
Adjusting Image Size in Basler Software
With this software, you can adjust the image size to your desired dimensions. In most cases, reducing the image size increases the image capture speed.
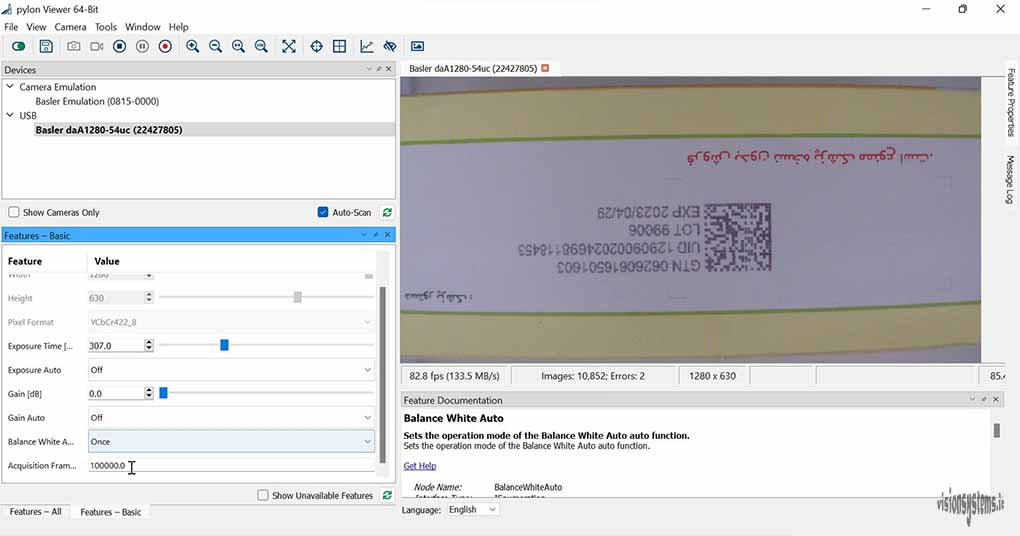
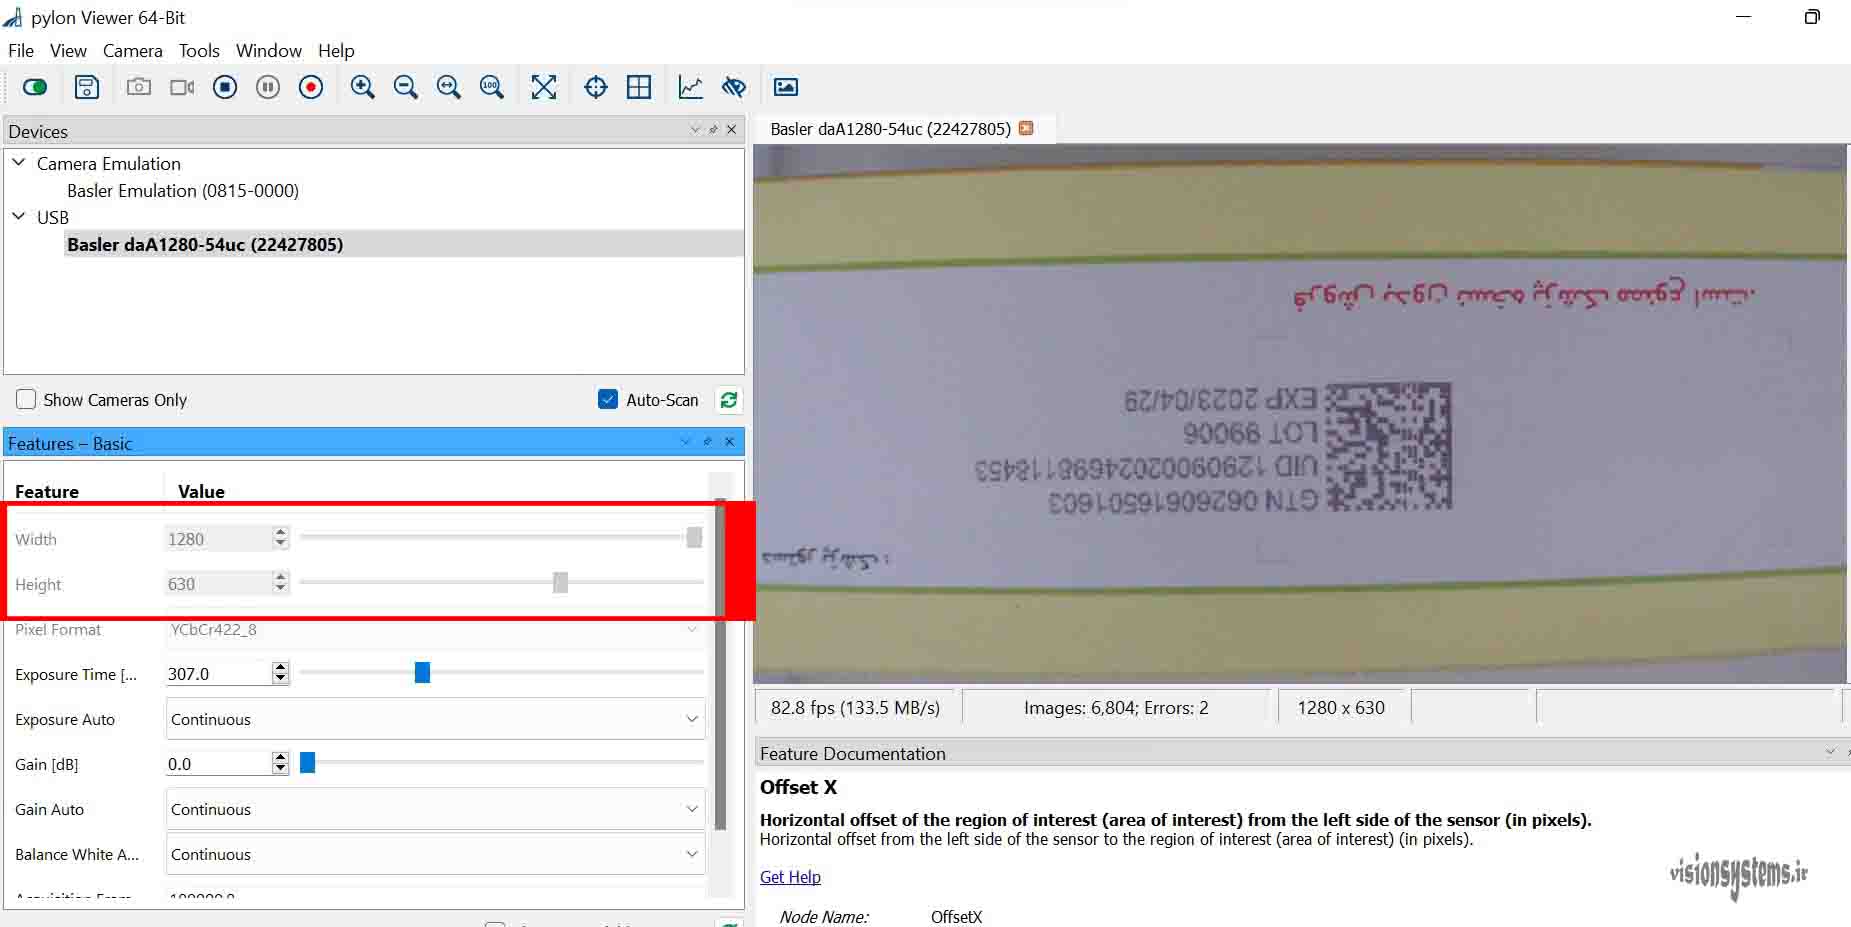
To reduce the image size in Pylon software, click on the “Stop” option in the toolbar to change the image dimensions. As visible in the image, you can remove the top and bottom parts of the box to reduce the image size.
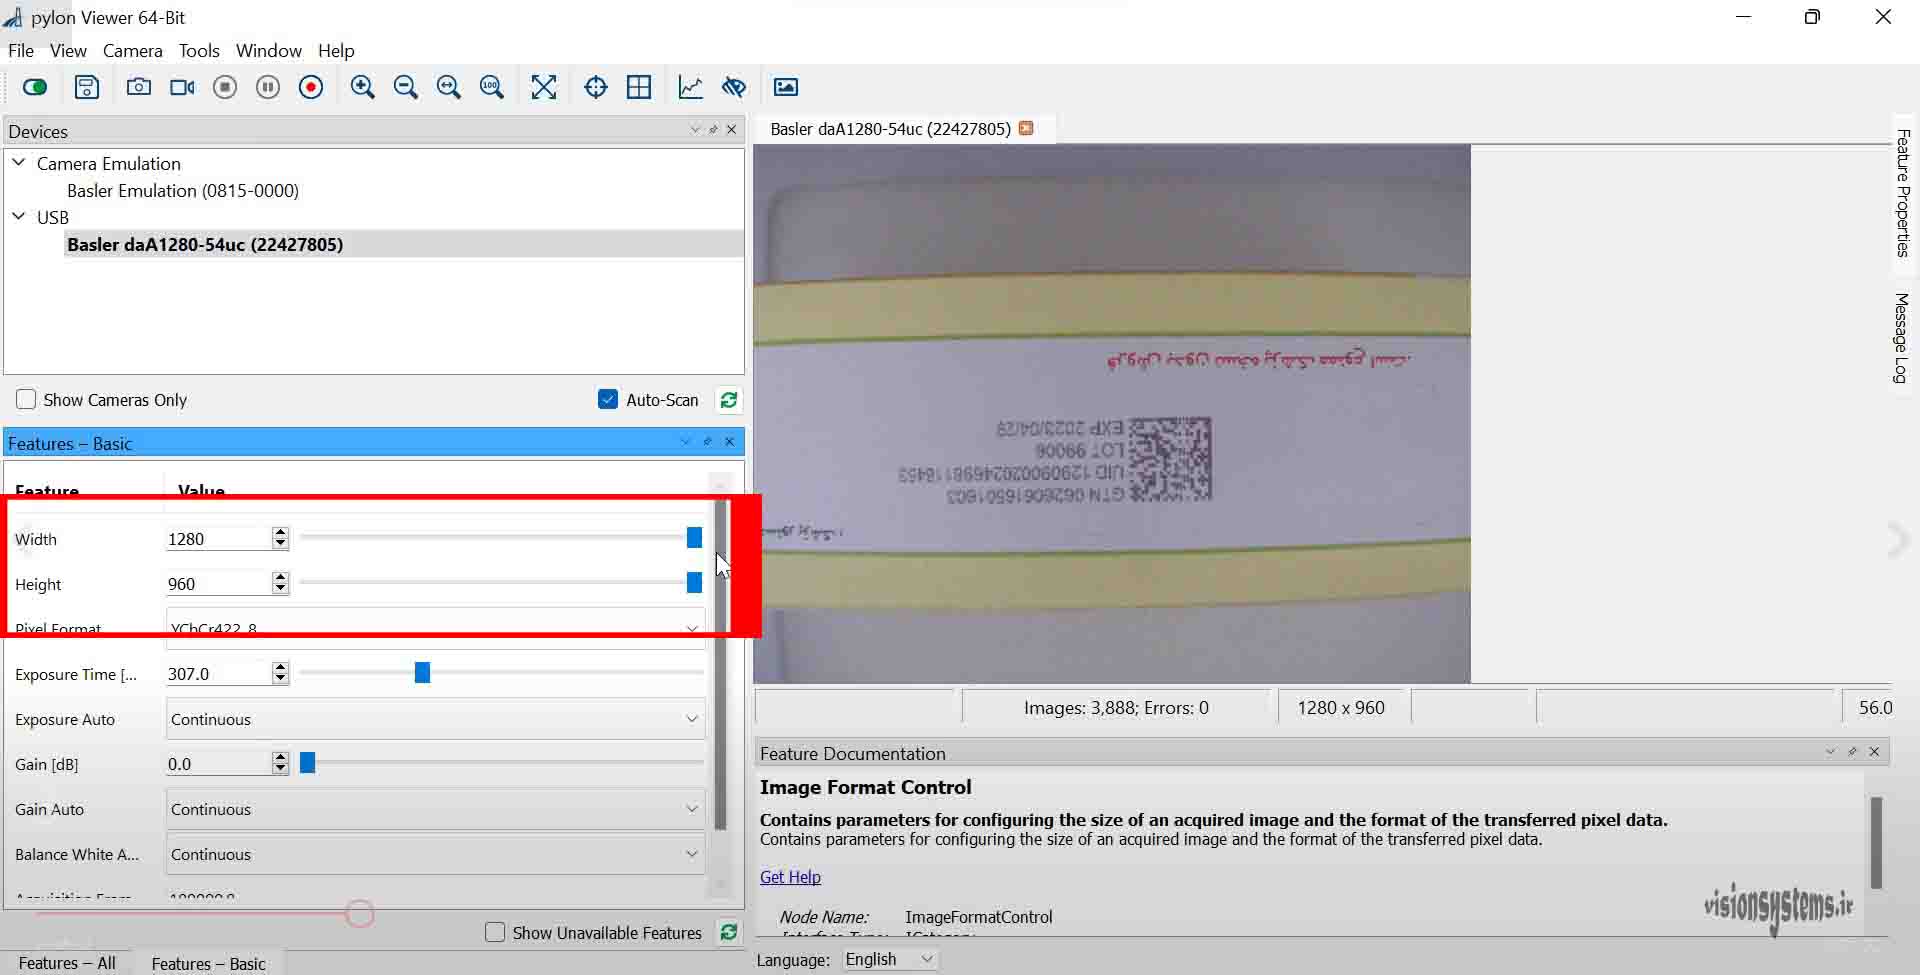
To reduce the image size, simply decrease the image height. Changing the image height from 960 to 630 will result in the image shown below.
Adjusting Light and Image Quality in Pylon Software
Adjusting the image brightness is done using the exposure time parameter. Exposure time indicates the duration during which the camera sensor absorbs light. Increasing the exposure time increases the image brightness, and if this parameter exceeds a certain value, the frame rate will decrease. More on the frame rate parameter will be explained later in the article.
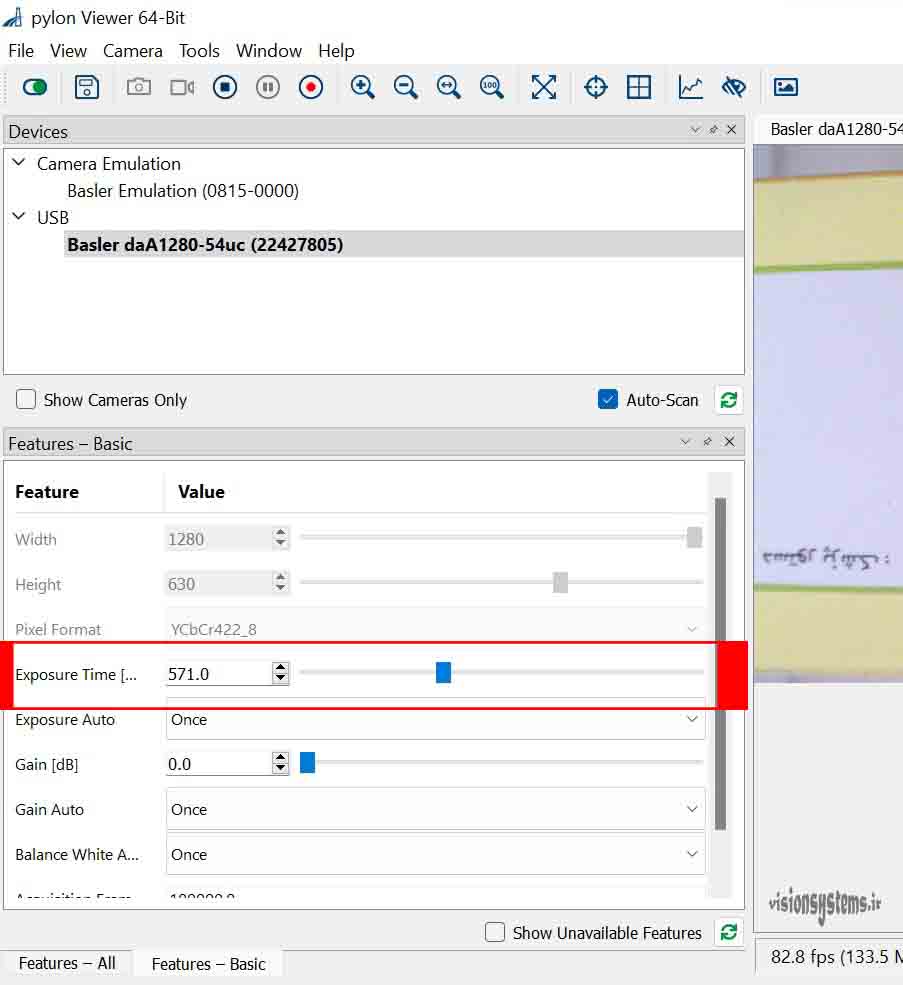
Setting Exposure Time
To adjust the exposure time, simply enter its value in microseconds in the software. As an example, in the image below, the exposure time is set to 571 microseconds.
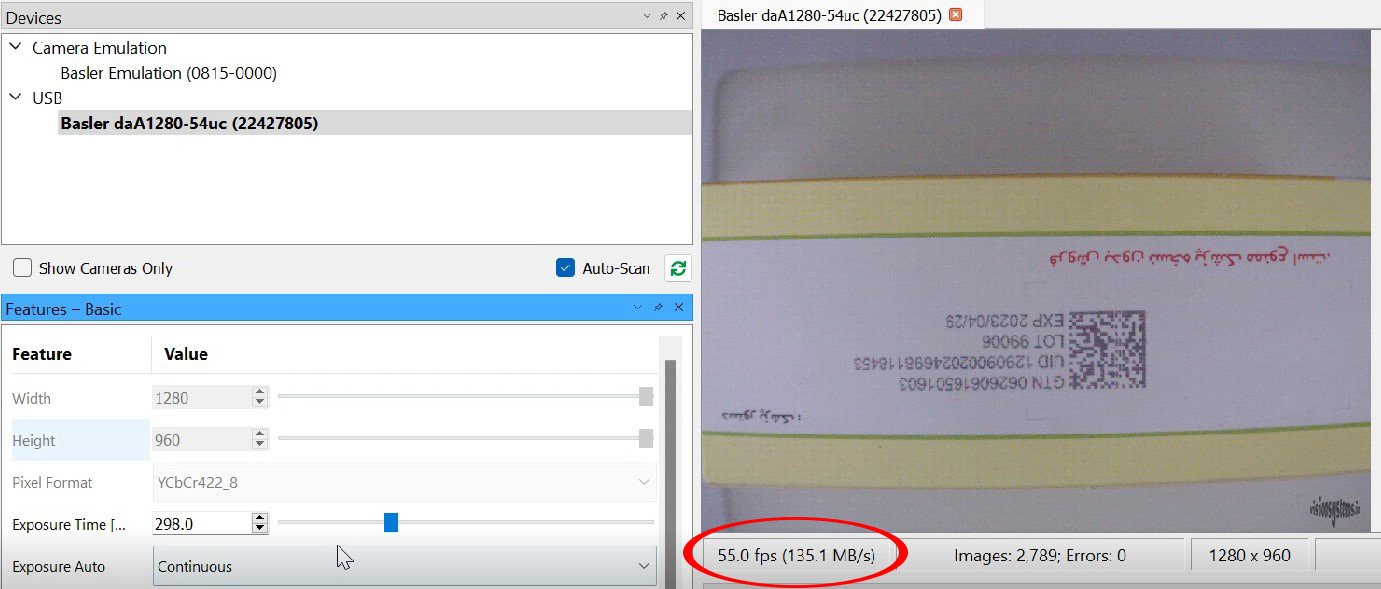
Displaying Frames Per Second (FPS)
One crucial aspect to consider in industrial camera settings is the frames per second (FPS), indicating how many images the camera captures in one second. Increasing the exposure time will decrease this parameter.
FPS is displayed as fps. As seen in the image below, the camera captures 55 frames per second.
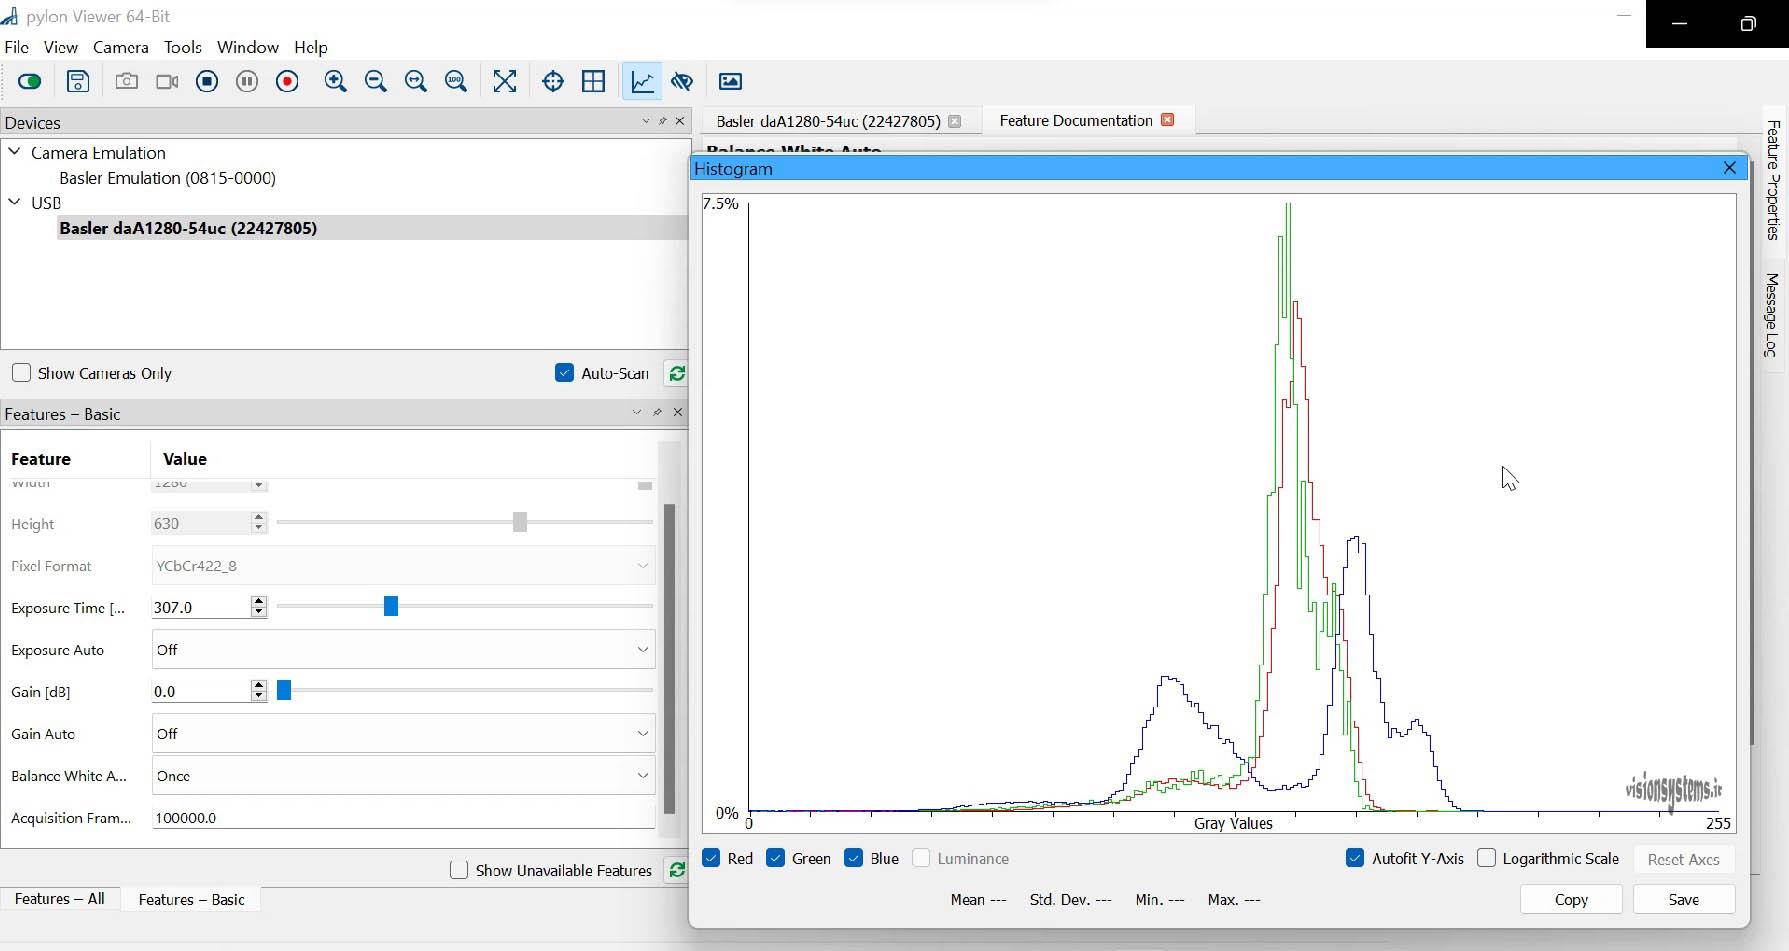
Displaying Image Histogram in Pylon Software
One important feature in Pylon software is the ability to display image histograms, allowing you to adjust image brightness. To display the image histogram in Pylon software, click on the corresponding option in the toolbar, as shown in the image below. The histogram will then be displayed.
One important use of image histograms is adjusting image brightness. For more information on adjusting image brightness using the histogram chart, click here.
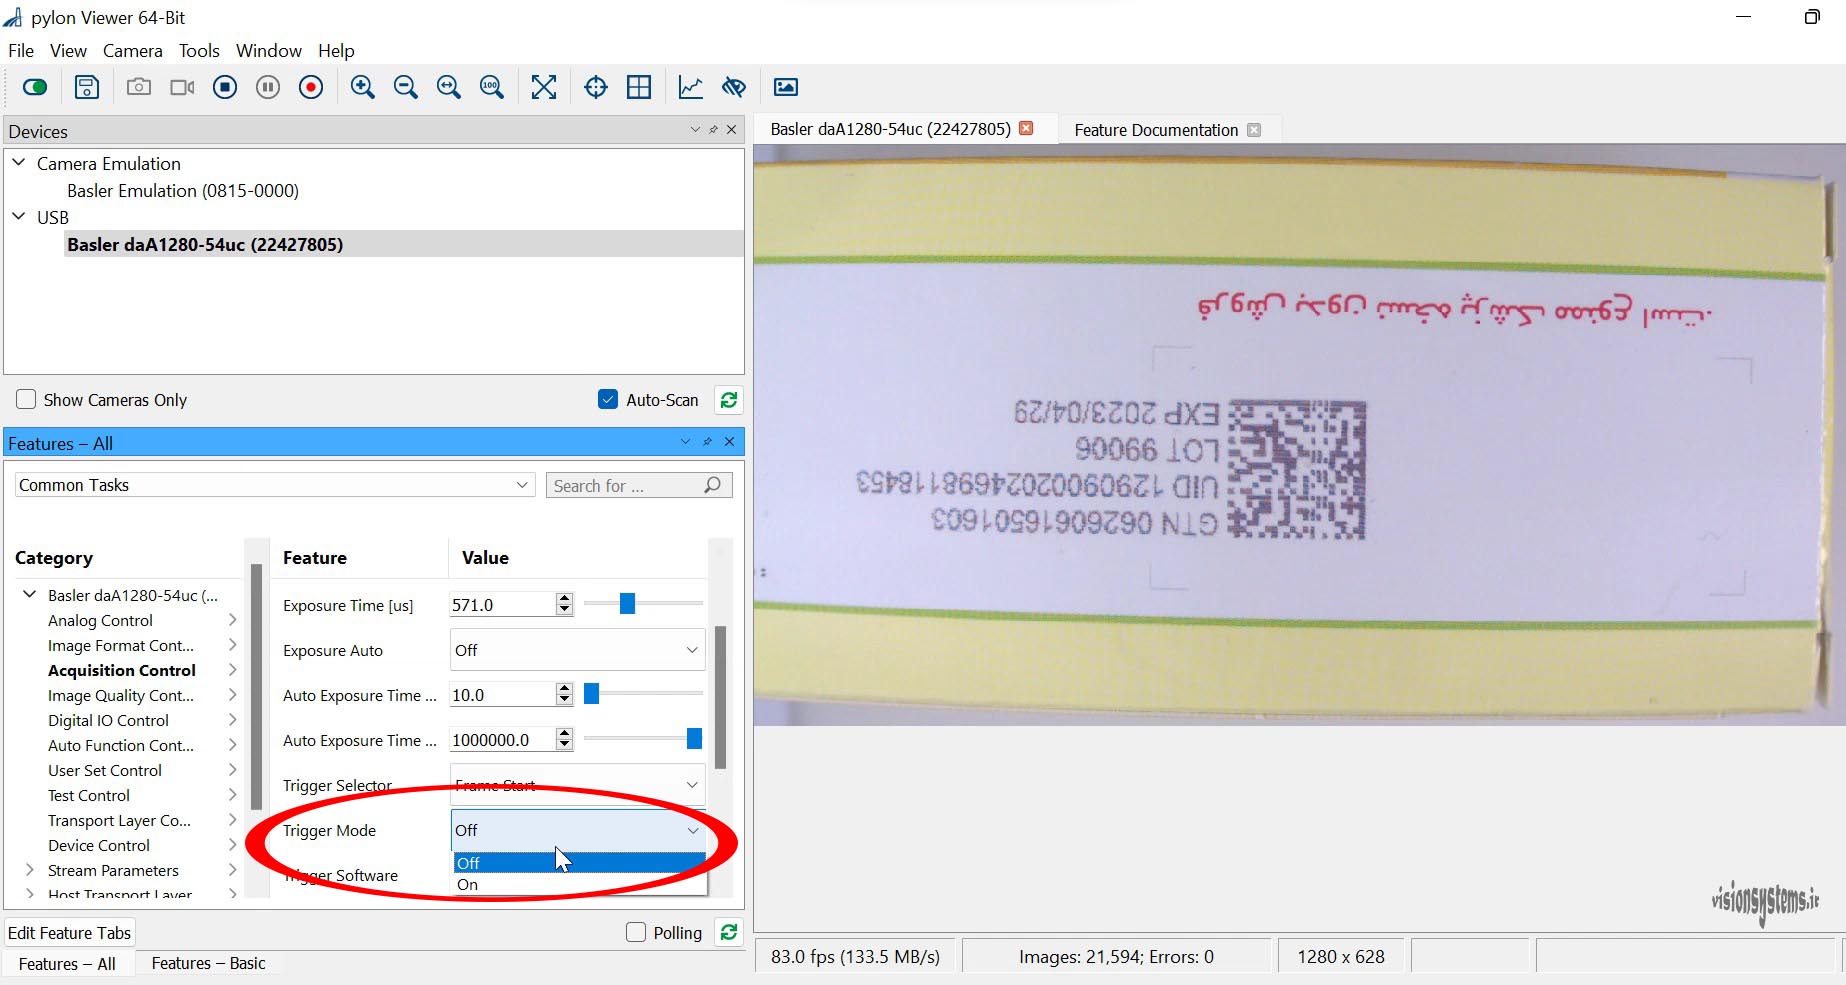
Adjusting Image Capture with Pylon Software
If we want to capture an image of a product moving on a conveyor belt, we can use a sensor to detect the timing of image capture when the product is under the camera. We can then send the image capture command to the camera with a weak electrical signal. Industrial cameras can capture images using a weak electrical pressure signal.
In Pylon software, turning on the Trigger mode allows the camera to capture images using an electrical signal; otherwise, images are captured continuously (like a video). Therefore, to adjust focus and image brightness, set Trigger mode to off. After adjusting the settings, if you want to capture images using a sensor command, set Trigger mode to on.